
I have no secrets — so far I’ve earned €14.18 (the minimum to cash out is €25). Thanks for your support!
A few people who follow my articles –especially the new series about Linux device drivers– have asked me about the hardware they should buy for embedded Linux development. And that did not surprise me, because we all love getting new toys to hack around with. This article addresses such an interesting topic, and walks through the basic components that everyone should have to learn embedded Linux as well as some nice to have stuff that will make your life much easier. I have added some more advanced alternatives for experienced developers as well, so everyone can get something useful out of it.
But I don’t want to throw a random list of articles without saying why and when you will need them; instead, I would like to add some value with my own, honest insights. I will explain why and when you will need them, from the point of view of an embedded Linux developer and Linux kernel contributor, both professionally and as a hobbyist, and based on my own experience. I hope you will find something useful!
Content:
- Shopping list
- Single Board Computer (SBC)
- Power Supply
- Breadboards
- Multimeter
- Wiring/Connectivity
- Soldering Station
- Oscilloscope
- Matrix boards and SMD adapters
- Peripherals
- Logic analyzer
Shopping list
In a nutshell, that’s what every embedded Linux developer should have at home, at work and in their pockets just in case:
- A Single Board Computer (SBC).
- A power supply.
- Breadboards.
- A multimeter.
- Basic wiring/connectivity.
And then, depending on your budget and needs, you could/should get:
- A soldering station.
- An oscilloscope.
- Matrix boards and SMD adapters.
- Peripherals, lots of peripherals!
- Logic analyzer
Single Board Computer (SBC)
This is by far the most important element. It is a board built around a System on Chip (SoC), which is where the CPU, GPU, memory, and other essential peripherals live together in harmony (well, most of the time). It’s the brain of modern embedded systems, powering everything from your smart toaster to industrial robots. Many manufacturers offer SBCs that simplify access to SoCs, providing developers with a ready-to-use platform that eliminates the need for custom hardware design. They offer a convenient way to prototype, test, and deploy embedded systems quickly, with built-in support for peripherals and connectivity, making them ideal for accelerating development.
Currently, the main architecture used in embedded systems is by far ARM64. Therefore, for a complete beginner, I would start with an ARM64-based SoC: you will find a lot of documentation, and most of the things will work out of the box. I always recommend Raspberry Pi and BeagleBoard SBCs because they are the first choices by hobbyists, and you will never lack of online support. They are not the only ARM64 options, though, and I am going to show you a few of them.
If you’re feeling brave and adventurous, you might want to go for a RISC-V SoC—an open architecture that’s incredibly promising (its fans will tell you it’s not just promising; it’s already a reality :D). I will tell you more about it later as well.
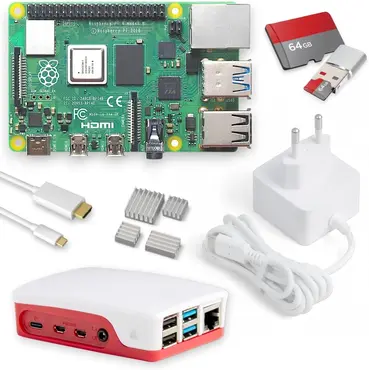
When available, I have added two options for each SBC: bare SBC (you will need to buy some extra stuff like a power supply, a case, wires, etc. and in some cases, solder pins) and all-in-one kit (the easiest option: you get everything you need and are ready to hack within minutes).
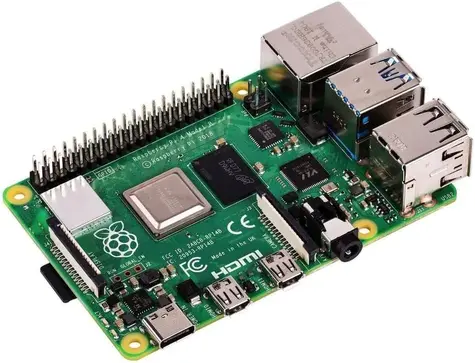
Raspberry Pi
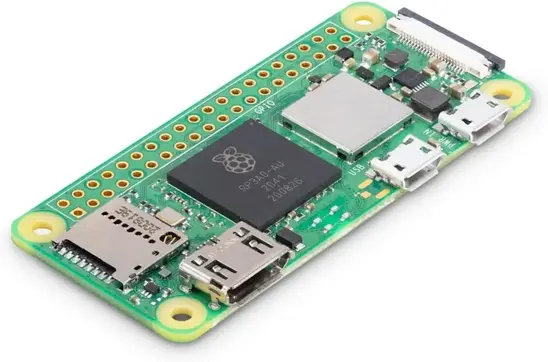
Probably the most common SBC among hobbyists, it is supported by many distributions, and you will find a lot of information online as well as an infinite number of projects for them. There are also hundreds, if not thousands, of plug&play peripherals for them. I have three Raspberry Pi SBCs myself: Raspberry Pi 4 model B, 5, and zero 2 w, and every one of them has its pros and cons.
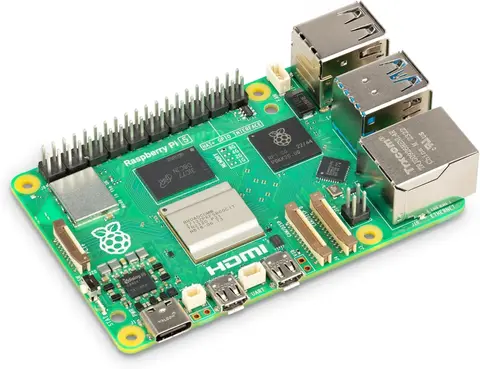
The Raspberry Pi 4 and 5 are the most convenient ones to have on your desk for several reasons: greater power, connectivity, and more convenient boot options like USB boot (booting from a USB memory) and network boot (what most professional embedded Linux developers use) thanks to their Ethernet connectivity. The Raspberry Pi 5 is by far the most powerful one (hence why it needs heat sinks), and you will be covered for many years without hardware upgrades. If you are a bit on a budget, the Raspberry Pi 4 is still completely fine, and you will find a lot of documentation for it.
But if you’re looking for a low-power, low-price solution, the Raspberry Pi Zero 2 W is probably a more interesting option. Keep in mind that it’s quite limited in terms of RAM and connectors, but for example, if you’re going on a trip (like me, bikepacking!), it’s ideal due to its size, weight, and low power consumption. The following table summarizes the main features, pros and cons of the three models:
| Feature | Raspberry Pi 4 Model B | Raspberry Pi 5 | Raspberry Pi Zero 2 W |
|---|---|---|---|
| CPU | Quad-core Cortex-A72 @ 1.5GHz | Quad-core Cortex-A76 @ 2.4GHz | Quad-core Cortex-A53 @ 1GHz |
| GPU | VideoCore VI | VideoCore VII | VideoCore IV |
| RAM | 2GB, 4GB, 8GB | 4GB, 8GB, 16GB | 512MB |
| Connectivity | Wi-Fi, Bluetooth, Gb Eth. | Wi-Fi, Bluetooth, 2.5Gb Eth. | Wi-Fi, Bluetooth |
| USB Ports | 2x USB 3.0, 2x USB 2.0 | 2x USB 3.0, 2x USB 2.0 | 1x Micro USB |
| Power Supply | USB-C (5V/3A) | USB-C (5V/5A) | Micro USB (5V/2.5A) |
| GPIO Pins | 40 | 40 | 40 |
| Pros | Versatile, stable and well tested | Performance, fast Eth., lifespan | Compact, low power |
| Cons | Bulky, less efficient | Price, power, heat dissipation | Low RAM, slow CPU |
By the way, often a kit is the only way to get the Raspberry Pi 5 due to supply shortages.
 Buy on Amazon: Raspberry Pi 4 model B
 Buy on Amazon: Raspberry Pi 4 model B Kit
 Buy on Amazon: Raspberry Pi 5
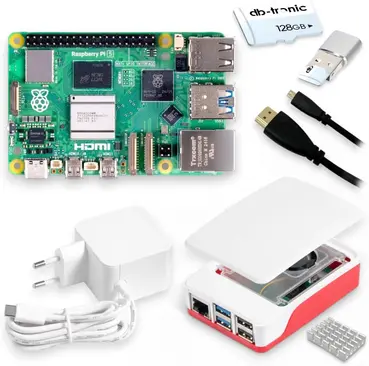 Buy on Amazon: Raspberry Pi 5 Kit
 Buy on Amazon: Raspberry Pi zero 2 w
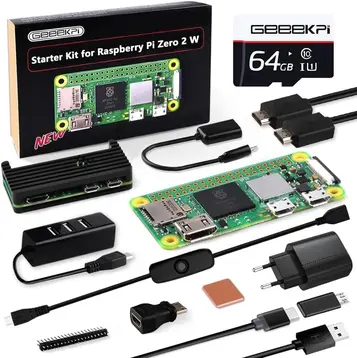 Buy on Amazon: Raspberry Pi zero 2 w Kit
BeagleBoard
Although BeagleBoard SBCs are usually less powerful than their equivalent in the Raspberry Pi world, they offer several advantages that make them shine, especially among high-end embedded developers. There are a lot of sources of information and projects for them too (maybe not as many as for Raspberry Pi, but often coming from experts), and for Linux kernel developers it is awesome because you can run the mainline kernel without a full out-of-tree patchstack or a kernel fork like on a Raspberry Pi (that fork is well maintained and up-to-date, and I have successfully developed multiple drivers based on it, but it’s worth to mention).
I don’t have any BeagleBoard at the moment, but I have used different models in the past (and probably again in the near future), and they are reliable, and nice to work with. Maybe they are not as powerful as other models in this article, but you will save some current consumption while enjoying a SoC that the open source community loves. Moreover, you will have zero issues to follow my articles and tutorials with this board, because everything on it just works.
The recommended models at the moment (ARM64) are the iconic BeagleBone Black, and the more powerful BeaglePlay. As with the Raspberry Pi, both have pros and cons, and any of them will be alright for most applications. As I have experience with the BeagleBone Black, and it is more affordable and widely used, that’s the one I will recommend you. There are better places to buy this board than Amazon, so it’s better that you take a look at this (non-commercial) link to the official site because their official sellers offer better prices.
Orange/Banana Pi & co.
These SoCs offer much more power and features than the ones I mentioned before. Then this article should be me saying: get one of these and move on, right? Well, there’s always a tradeoff. First, there is way less information online, and sometimes you will be on your own. That’s usually fun and challenging, but also time-consuming and sometimes terrifying, especially for beginners. Second, upstream support for these boards is usually worse because there are fewer users, and you might get stuck in vendor-specific code to make use of all their features. But I must say that they are catching up very quickly, because many companies are basing their designs on cheap, yet very powerful SoCs like these. I have seen a lot of activity in the mainline kernel from different companies, and they are doing it for good reasons.
Many of those cheap SBCs are built upon Rockchip SoCs, and I have professional experience with ARM64 Rockchip-based SoCs. They are well suited for commercial projects because of their lower cost and many features, but I can tell you that the documentation and customer support is way worse than the other ARM64 SoCs. In the end, everything will work with some extra effort from your side and the community, but be ready to stumble upon unexpected issues from time to time. If you would like to get one of the most powerful SBCs for a consumer level, the following Orange Pi 5 Plus is even more powerful than many consumer workstations: 8 cores (Quad Core CortexA76 + Quad Core CortexA55), 16 GB LPDD4 RAM, 8K codec… a beast, really.
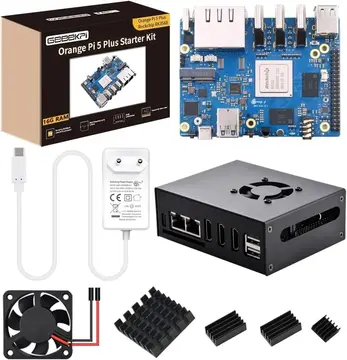 Buy on Amazon: GeekPi Orange Pi 5 Plus
Another SBC I would also like to mention in this section are the Radxa Rock, which is based on Rockchip as well. I have been able to run Armbian (and even Ubuntu) on the 5B at work, and most of their features worked out of the box, but as soon as you delve into specific hardware features, you notice that there is still a lot of work in progress upstream. But maybe that’s exactly what you are looking for! As a cheaper and simpler alternative, the Radxa 4SE from the link below features the RK3339 SoC, which has been supported by the Linux kernel for quite a while. This SBC is probably one of the most interesting ones to have something powerful in the middle-range price, featuring an Arm Mali T860 MP4 GPU.
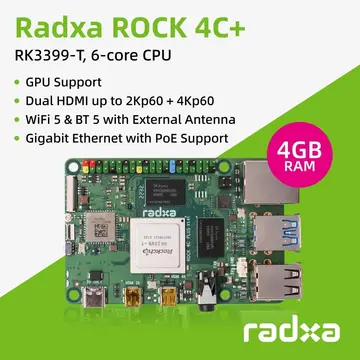 Buy on Amazon: Radxa Rock 4C+
Attention on Radxa products has been increasing for some time, and not only due to the Rock models. The latest hit is without a doubt the Radxa Orion O6, which is out of the scope of this article, as it is a more advanced board and relatively new. My advice: if you are new to the Linux embedded world, be realistic and stick to simpler devices!
RISC-V SoCs
Recently, I acquired a board based on a chip with RISC-V architecture, but I’m still testing it and figuring out what works and what doesn’t. Since there aren’t many well-established alternatives in the market yet, and I only have experience with my board, I’ll be a bit cautious in this section.
There is an increasing number of RISC-V boards entering the market, catering to hobbyists, developers, and researchers. Even though I have not seen many commercial products based on RISC-V myself, I guess it will not take long until they get a relevant position in many industries. Among the most popular options, the HiFive Unmatched is the one that gets mentioned over and over again when you look for RISC-V boards. Despite the significant supply issues with the HiFive Unmatched, those who managed to get their hands on one highlight its excellent Linux support and impressive performance. I can’t tell myself, but as we’ll see shortly, we can take an “other fruit”-style approach from a Chinese company to acquire a powerful RISC-V SBC. Just to mention one of manufacturers that appeared when we discussed ARM64 boards, BeagleBoard is also venturing into the RISC-V space with the BeagleV.
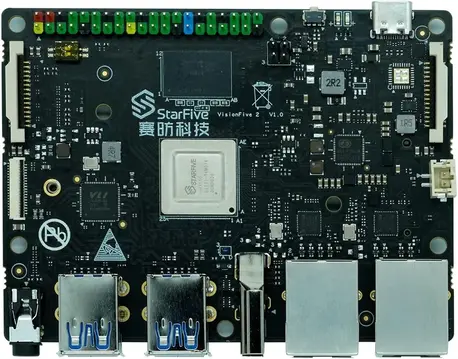
What board do I have then? One of those xxxFive, the one that is getting more and more attention these days, and it’s available: the StarFive VisionFive 2 (link below). It features a quad-core StarFive JH7110 RISC-V processor running at up to 1.5 GHz, paired with 8 GB of LPDDR4 RAM. There should be a 4GB version according to the specs, but I could not find it on the market. Linux support is ever–growing, with distributions like Debian and Ubuntu offering compatibility. I have to admit that installing Ubuntu required some work (apparently, some revisions don’t, check here if it would apply to yours), and a few core blocks like the GPU did not work the last time I tried. It will come, but it might take some time. Who knows, maybe you will be the one who brings more support for the whole community!
 Buy on Amazon: StarFive VisionFive 2
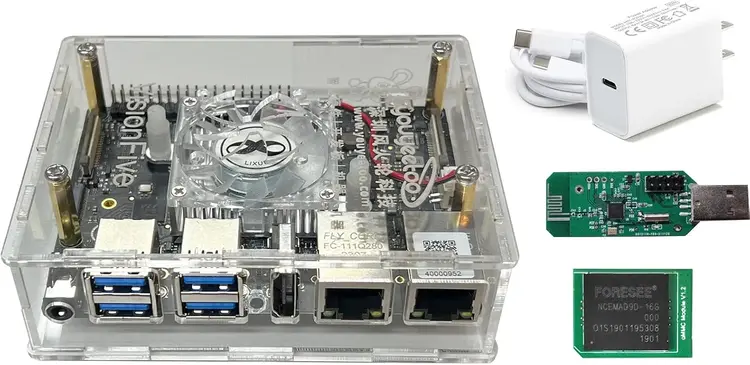 Buy on Amazon: StarFive VisionFive 2 Kit
Power Supply
Having a bench power supply on your desk is awesome: you can select a wide range of voltage and current levels quickly and with high precision, being able to measure total power consumption. But they are not (easily) portable, and in many cases, especially when you are at the beginning of your journey to become an embedded Linux developer, you will be able to manage with a simple power supply for the SoC and the power outputs it provides, perhaps with another simple power supply for any piece of hardware connected to the system that requires more than what the SoC can supply.
If you are going to rely on the SoC to feed the rest of the system, then you will just need an AC/DC converter with ~18W USB output, and depending on what you want to develop, maybe a lithium battery, which I will leave out of this article because it would be a topic on its own. If you bought a starter kit like the ones I mentioned, you will have received a power supply as well. For those who have acquired a bare SoC, I would recommend you one with an integrated switch for convenience. Believe me, you will regret saving a couple of bucks here and having to connect and disconnect the power supply every time.
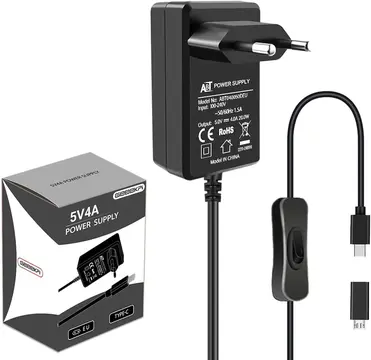 Buy on Amazon: Power Supply 5V with ON/OFF switch
Should you prefer a bench power supply, I would recommend you a simple, digital one that will cover almost all cases. For more professional environments, I would opt for the typical device you will find in an electronics lab: one with three independent, high-precision outputs (10mV/10mA is more than enough), and additional measurement/analysis features.
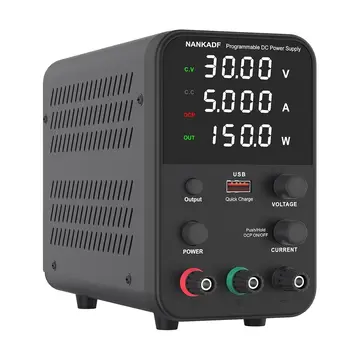 Buy on Amazon: DC Power Supply one output
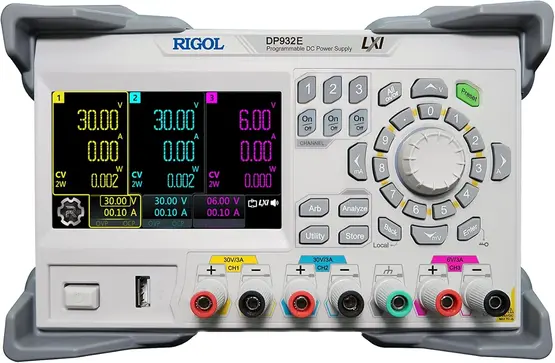 Buy on Amazon: DC Power Supply three outputs
Breadboards
One of those things where you don’t have to spend much money, or even think what model would suit your needs. Apart from their size, they are all more or less the same. Just get a kit with a couple of boards and a bunch of jumper wires, and you will be good to go.
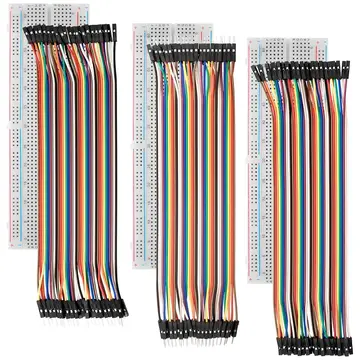 Buy on Amazon: Breadboards + Jumper wires
Multimeter
This is a very important device that you should have from the beginning. There are many different models out there, but in general you will not need anything special. A super basic multimeter will be able to measure current, voltage, resistance and continuity (audible is always nicer), and you will seldom need anything else.
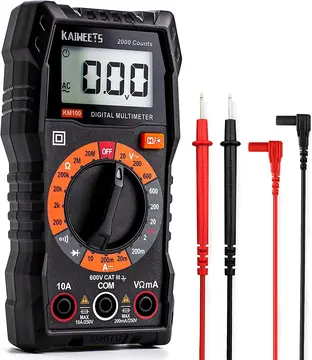 Buy on Amazon: Cost-effective multimeter
It’s also true that better models don’t cost a fortune either, and you will get a more robust and compact device with a few more cool functions like frequency and duty cycle measurements, which are even more useful if you don’t have an oscilloscope. These devices should last many years, and the first you buy will stay around long. Personally, I have a Crenova MS8233D, and I am very happy with it:
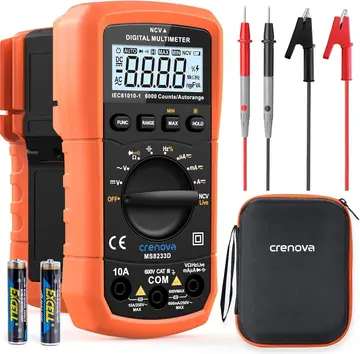 Buy on Amazon: Crenova MS8233D multimeter
Wiring/Connectivity
Every project has its own connectivity requirements, and I can’t cover all kinds of cables, adapters, and wireless modules. My advice: take some time to evaluate what you are going to need from the very beginning, and order it as soon as possible. And don’t forget debugging capabilities! For example, SSH is often enough to debug an embedded system, but I like serial communication to see early messages as they are generated or get easy and quick access to the bootloader. And oh surprise, not all embedded systems are capable of wireless communication! The cable I always use for serial communication is the following one, which has two different connectors on the TTL-side, and the color code described on the USB-side.
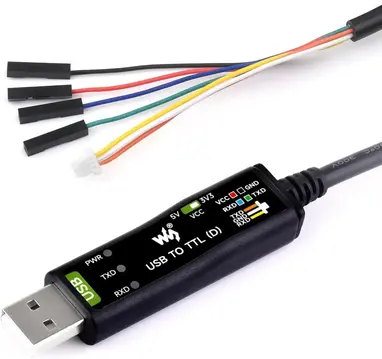 Buy on Amazon: USB to TTL cable
For quick prototyping, some jumper wires (like the ones I mentioned when I talked about Breadboards) are always nice to have, and they are really cheap.
Soldering Station
This is another simple item unless you really want to solder small and complex stuff, which at least in the beginning will seldom be the case. Just get a regular, inexpensive soldering kit with the bare-minimum features: adjustable temperature, interchangeable iron tips and a stable base to put the soldering iron when you are doing something else. I can guarantee you that you, and especially your desk, will regret getting a soldering iron with no base. Here’s a low-budget kit that will be enough for easy tasks:
 Buy on Amazon: Basic soldering set
If you are planning to solder more often, of if you want to suffer less while desoldering, you could (and probably should) get something slightly more advanced. But really, there is no need to get too fancy, as there are other elements where investing some extra money will make a bigger difference. A soldering station with a hot air tool and digital adjustment will be enough for almost everyone. This one will be a perfect tool for almost everyone:
 Buy on Amazon: Advanced soldering set
Additionally, I would recommend you to get helping hands because they are worthy of their name and make soldering a bit easier. Other cheap but useful items like flux paste and solder wick will also come in handy to make soldering and desoldering even easier.
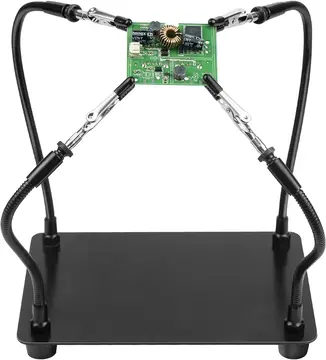 Buy on Amazon: Helping hand soldering
 Buy on Amazon: Flux
 Buy on Amazon: Solder wick
Oscilloscope
This is one of the most expensive items. They are great to have, and once you have one, you will be using it all the time. But if you don’t need to measure digital signals, or only DC, leave this device for the future. Not having any means to measure clocks, data signals and combinations of them is not optimal, but many hobbyists do as much as they can with the multimeter and hope for the best. As I mentioned before when I discussed multimeters, many offer basic information like frequency and duty cycle for low-frequency signals. On the other hand, there are nowadays relatively cheap oscilloscopes with a bandwidth of ~100MHz and sample rates around 500Msa/s, like the one below:
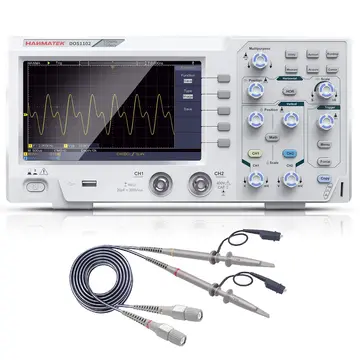 Buy on Amazon: Cost-efficient oscilloscope
That will be alright for low-frequency —and most medium-frequency– applications. If you would like to invest in a better device with many more analysis features and higher sample rates for better resolution, I could recommend you Siglent, which is the brand I use at work. The oscilloscopes we have cost at least 2 grand, some of them much more, but there are also more affordable models from the same manufacturer that will have you well covered. For example, the Siglent SDS1104X-E provides 4 channels, it reaches 1Gsa/s, and you will be able to analyze several serial protocols like I2C and SPI.
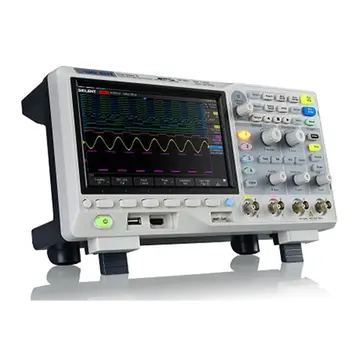 Buy on Amazon: Siglent SDS1104X-E
If you have enough with 2 channels, and you would rather have a bandwidth of 200 MHz and save some money, the Siglent SDS1202X-E would be a great option:
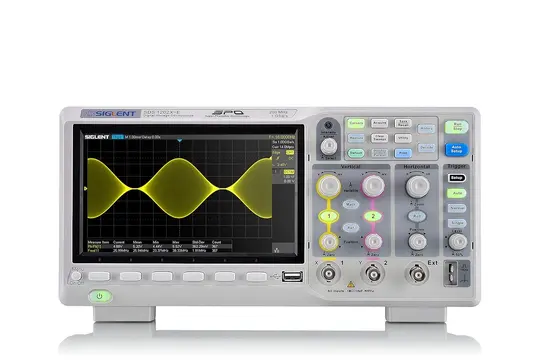 Buy on Amazon: Siglent SDS1202X-E
Matrix boards and SMD adapters
The SMD equivalent to the breadboard we saw before. As I said before, you will not find many through-hole devices these days beyond breakout boards, and SMD is a very common alternative. And again, keep it simple: get regular matrix boards (single or double-sided, 2.54mm pitch, you can use them for through-hole devices too) that you will use to quickly assemble look-alike PCBs, and some basic SMD adapters for common packages. In the end, if your prototype will turn into a product or at least a more robust system, you (or someone else) will have to design a PCB. But until then, these solutions will increase your productivity in the development/prototyping phase a lot!
Needless to say, you will need access to a soldering iron, but as we saw before when we discussedsoldering stations, there are affordable options out there.
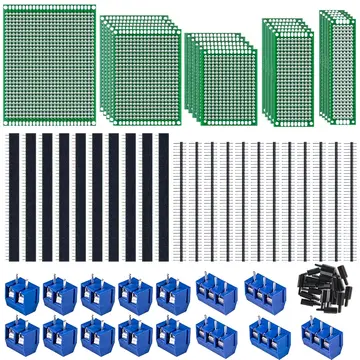 Buy on Amazon: Matrix boards
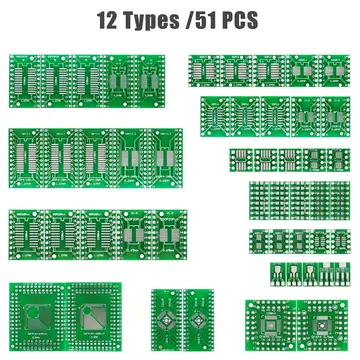 Buy on Amazon: SMD Adapters
Peripherals
I will leave this one to you. Look for any peripherals that could help you develop an interesting project: maybe some touchscreen to receive input from the user, a Bluetooth module… whatever you like. No matter what you choose, expanding your SBC with more devices will be fun, and you will gather a lot of experience.
I will only add that if you are looking for hardware to program your first Linux device driver, check out this article for more information about how to choose one and optimize your time. For me, getting new peripherals and integrating them into a running system is a very entertaining hobby, and I enjoy it a lot!
Logic analyzer
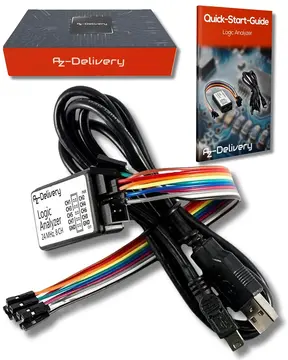
I covered this in more detail in this article about I2C on Linux, but given that a logic analyzer is a fairly common tool in the embedded world, I would like to mention it here as well. In short, a logic analyzer is a tool used to capture and analyze digital signals, particularly useful in debugging and verifying serial protocols like I2C, SPI, or UART in embedded systems. Oscilloscopes, even those with a serial bus decoder like the last two ones that I mentioned before, are sometimes limited when it comes to trace long transactions, filter packets, and analyze the communication at the protocol level. A cheap option (under $15) is the AZDelivery Logic Analyzer:
 Buy on Amazon: AZDelivery Logic Analyzer
This logic analyzer can sniff a bus, and thanks to its USB end, transmit the information to your PC to inspect it by means of some signal analysis software suite. A well-known, open-source option is sigrok, that supports different frontends like PulseView and sigrok-cli for CLI lovers, and it even packages a library to integrate it into your projects. It might be worth mentioning that AZDelivery also provides its own open-source libraries for Raspberry Pi to make things even easier.
Maybe you think that buying everything from the list will cost you and arm and a leg, and it’s true that some things are not exactly cheap. But the basic package is indeed affordable, and it will provide you everything you need to become an embedded Linux developer. Moreover, most of these articles are meant to last for many years: Oscilloscopes, multimeters, and soldering irons over 10 years old are very common.
Once you get the bare minimum to start hacking, the learning process will be fun and pretty similar to what you will then do as a professional embedded Linux developer, which is a highly sought-after and well-paid profile… unless you dedicate yourself to bikepacking, of course 😅 And most of the hardware, including the SBCs will stay there for your future projects. All things considered, it sounds like a pretty good investment 😉