Contributing to the Linux kernel with a new device driver, especially for the first time, requires a considerable amount of effort: reading kernel documentation and datasheets, programming the code to interact with the device, testing and debugging. Some subsystems even require some specific documentation about the implemented driver (like hwmon), and of course you have to document any new attribute your driver exposes via sysfs. Is that not enough work? Well… what about documenting the device itself?
Documenting a device in the Linux kernel requires you to describe the device properties in a YAML file following JSON-schema vocabulary, so they can be used to describe the device in a device tree, and also code some example of how to implement such description. Not only that, your bindings will have to be verifiable, throwing no errors or warnings in the process. Hold on! YAML files? JSON-schema? Documentation throwing errors and warnings? Panic!
Even though it is not as trivial as it used to be (txt files are history, and they are being converted to YAML files), writing DT bindings is not that difficult: they follow a pretty regular structure, and their verification is rather simple. In this article, I will show you how to write simple bindings and validate them.
Content:
- 1. Writing DT bindings: a lot of plagiarism
- 2. Installing dtschema
- 3. Checking your bindings: no errors/warnings allowed
- 4. Is it really worth all the hassle?
1. Writing DT bindings: a lot of plagiarism
As you can imagine, there are many DT bindings upstream that you can use as examples. Often you will only need to copy existing bindings, adapt a couple of lines to your specific case, and rename the rest. You are not supposed to reinvent the wheel every time you write bindings (in fact, it is desired that they look like the existing ones), so feel free to “borrow” anything you need.
The general structure is well-defined in the official documentation, where you will find this annotated example with many useful inline comments, but maybe too cumbersome at first glance. DT bindings are one of those things that are much easier to understand if you see a simple example where things are put together. Therefore, I will show you a real case from the HDC3020 humidity/temperature sensor, which is an I2C device in the IIO subsystem:
# SPDX-License-Identifier: (GPL-2.0-only OR BSD-2-Clause)
%YAML 1.2
---
$id: http://devicetree.org/schemas/iio/humidity/ti,hdc3020.yaml#
$schema: http://devicetree.org/meta-schemas/core.yaml#

title: HDC3020/HDC3021/HDC3022 humidity and temperature iio sensors

maintainers:
  - Li peiyu <579lpy@gmail.com>
  - Javier Carrasco <javier.carrasco.cruz@gmail.com>

description:
  https://www.ti.com/lit/ds/symlink/hdc3020.pdf

  The HDC302x is an integrated capacitive based relative humidity (RH)
  and temperature sensor.

properties:
  compatible:
    oneOf:
      - items:
          - enum:
              - ti,hdc3021
              - ti,hdc3022
          - const: ti,hdc3020
      - const: ti,hdc3020

  interrupts:
    maxItems: 1

  vdd-supply: true

  reg:
    maxItems: 1

  reset-gpios:
    maxItems: 1

required:
  - compatible
  - reg
  - vdd-supply

additionalProperties: false

examples:
  - |
    #include <dt-bindings/gpio/gpio.h>
    #include <dt-bindings/interrupt-controller/irq.h>
    i2c {
        #address-cells = <1>;
        #size-cells = <0>;

        humidity-sensor@47 {
            compatible = "ti,hdc3021", "ti,hdc3020";
            reg = <0x47>;
            vdd-supply = <&vcc_3v3>;
            interrupt-parent = <&gpio3>;
            interrupts = <23 IRQ_TYPE_EDGE_RISING>;
            reset-gpios = <&gpio3 27 GPIO_ACTIVE_LOW>;
        };
    };
The YAML file can be found here: Documentation/devicetree/bindings/iio/humidity/ti,hdc3020.yaml. You will find this updated version (at the moment of writing) in iio/togreg-normal. If nothing bad happens, it will be merged for 6.10.
We can divide the bindings into three blocks:
-
Boilerplate stuff at the beginning: some renaming + link update is usually enough.
-
Properties: the first interesting part, where you define the device properties that are relevant for the kernel. Note the required list, which is usually something that beginners (partially or completely) omit, and the additionalProperties to exclude any property you did not define. If your bindings require properties from other bindings, make sure you reference those bindings and consider unevaluatedProperties instead.
-
Example: a DT node that shows how the device could be described, based on the properties defined above. In this case we added a node with a few properties to an i2c bus. Please, do not forget to include any header you might need (here gpio.h provides GPIO_ACTIVE_LOW and irq.h IRQ_TYPE_EDGE_RISING). You will find them under
include/dt-bindings. By the way, if you read my article about DT overlays for Raspberry Pi, the structure of this example should look familiar.
I know, the compatible property looks awkward, and it is not obvious. Don’t worry, usually you will only need a single string or a list of strings. This one accounts for a default compatible, and gives the possibility to be more precise with a second one if your device is not the default one. Here is a simpler example from other bindings I wrote for the VEML6075:
properties:
  compatible:
    const: vishay,veml6075
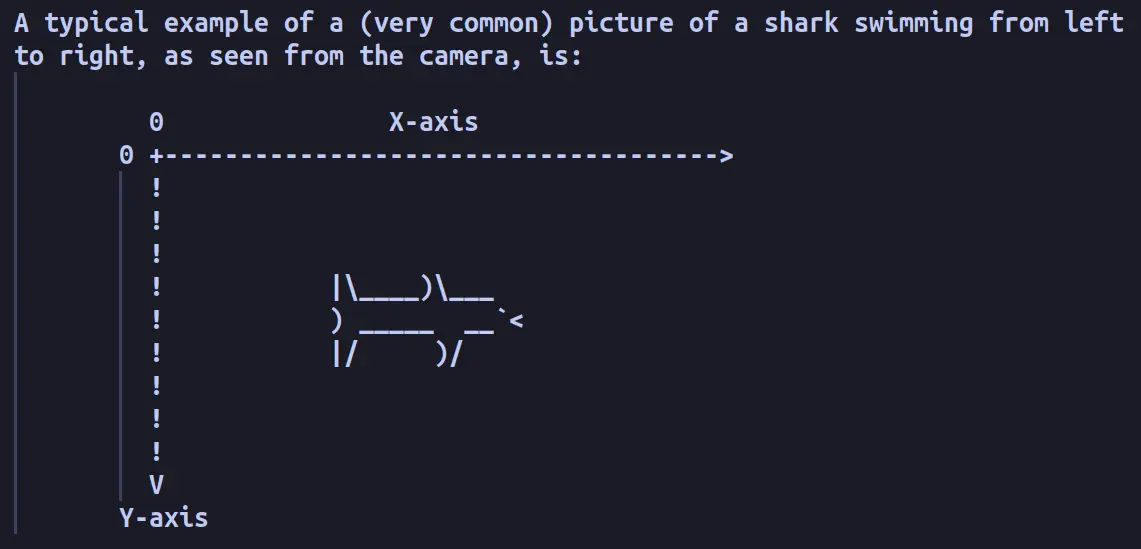
You might think that DT bindings are not the right place to show your creativity. And even though that is almost always the case, sometimes you can provide some more elaborate descriptions including drawings for clarification. The picture at the top of this article is actually a screenshot of media/video-interface-devices.yaml, which features an amazing shark.
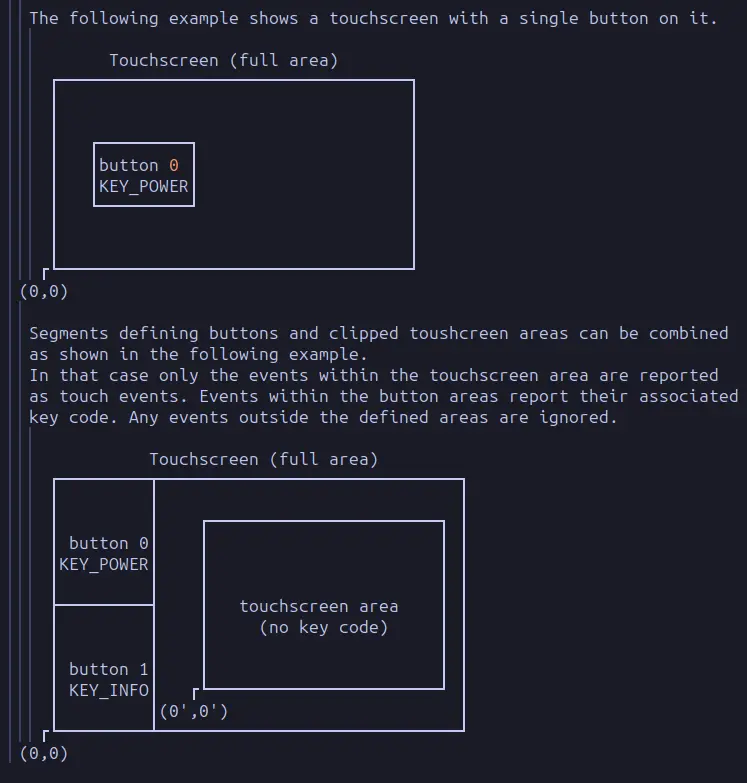
I used a similar approach (unfortunately, with much less fantasy) in this patch I sent to extend touchscreen.yaml:

2. Installing dtschema
Let’s suppose you have written your own bindings, or added new properties to the existing ones. As I said before, you can i.e. must verify your bindings, and dtschema is the right tool for the job. The installation steps are also documented, but I will reproduce them here for a new Debian/Ubuntu version, where you will not be able to install packages with pip3 that easily:
-
Install dependencies:
sudo apt install swig python3-dev - Instead of calling
pip3 install dtschema(you can try, it will fail), create a virtual environment first:# you might need to install python3.11-venv first: sudo apt install python3.11-venv python3 -m venv ~/.venv - Activate the virtual environment:
source ~/.venv/bin/activate # you can deactivate it with the 'deactivate' command - Install dtschema:
pip3 install dtschema
Ready to go!
3. Checking your bindings: no errors/warnings allowed
Before we start using dtschema to check stuff, I would like to mention that there are some tools you can use to avoid silly mistakes and save some time. For example, you can use linters to report typos, but also to meet style requirements. Personally, I included yamllint to my workflow, and I am happy with it. It follows the rules defined in a .yamllint file, like the one you will find under Documentation/devicetree/bindings.

Depending on your needs, you might want to check all bindings, some subset, or a single file. The official documentation will show you how to do that, but I like this concise article by Krzysztof Kozlowski, who is one of the maintainers of the Open Firmware and Devicetree subsystem. As we are also going to check bindings against arm64 DTs later, we can borrow some configuration from his article:
# Install gcc-aarch64-linux-gnu if you don't have it
export CROSS_COMPILE=aarch64-linux-gnu- ARCH=arm64
make defconfig
The DT bindings we saw before can be checked with the following command:
# if you still did not activate the virtual environment:
# source ~/.venv/bin/activate
$ make dt_binding_check DT_SCHEMA_FILES=ti,hdc3020.yaml
If you try it, you should not find any errors or warnings. You can make some mistake on purpose, and then see what happens. I will remove the vdd-supply property:
$ make dt_binding_check DT_SCHEMA_FILES=ti,hdc3020.yaml
  LINT    Documentation/devicetree/bindings
  CHKDT   Documentation/devicetree/bindings/processed-schema.json
  SCHEMA  Documentation/devicetree/bindings/processed-schema.json
/home/jc/pw/linux/Documentation/devicetree/bindings/net/snps,dwmac.yaml: mac-mode: missing type definition
  DTEX    Documentation/devicetree/bindings/iio/humidity/ti,hdc3020.example.dts
  DTC_CHK Documentation/devicetree/bindings/iio/humidity/ti,hdc3020.example.dtb
/home/jc/pw/linux/Documentation/devicetree/bindings/iio/humidity/ti,hdc3020.example.dtb: humidity-sensor@47: 'vdd-supply' is a required property
	from schema $id: http://devicetree.org/schemas/iio/humidity/ti,hdc3020.yaml#
Although it should be obvious that you have to check your bindings before sending them upstream, you can’t imagine how many people send broken bindings upstream. If I am honest, I know no subsystem that receives so many patches that don’t even compile. And often it is obvious that the bindings were not checked, which is embarrassing. I guess some people don’t know that bindings are verifiable, and some others only focus on the driver code. But your driver is not going to be accepted until you provide clean bindings, so devote some time to get them right.
4. Is it really worth all the hassle?
Why are we complicating things that much? In the end a .txt file is much simpler, and apart from typos, you will not make many mistakes. Well, because the validation is not only meant for your YAML file (which is a good thing for itself, because it enforces standardization). You can use dtschema to check complete device trees, for example to make sure that all the nodes include the required properties. But if you read Krzysztof’s article, you should know that you can check it again specific bindings, which is what we are going to do now.
Let’s add the bindings we saw before to some random DT, and see what happens. In this case, I chose the rk3588s-orangepi-5.dts under arch/arm64/boot/dts/rockchip. Why that one? To have some different fruit for once. Raspberries are delicious, but an orange is also great!
&i2c0 {
	pinctrl-names = "default";
	pinctrl-0 = <&i2c0m2_xfer>;
	status = "okay";

	humidity-sensor: hdc3020@47 {
		compatible = "ti,hdc3020";
		reg = <0x47>;
		vdd-supply = <&vcc_3v3_s0>;
		interrupt-parent = <&gpio3>;
		interrupts = <23 IRQ_TYPE_EDGE_RISING>;
		reset-gpios = <&gpio3 27 GPIO_ACTIVE_LOW>;
	};
	// ...
};
The moment of truth!
make CHECK_DTBS=y DT_SCHEMA_FILES=ti,hdc3020.yaml rockchip/rk3588s-orangepi-5.dtb
  DTC_CHK arch/arm64/boot/dts/rockchip/rk3588s-orangepi-5.dtb
arch/arm64/boot/dts/rockchip/rk3588s-orangepi-5.dts:154.30-161.4: ERROR (phandle_references): /i2c@fd880000/hdc3020@47: Reference to non-existent node or label "vcc_3v3"

ERROR: Input tree has errors, aborting (use -f to force output)
make[3]: *** [scripts/Makefile.lib:419: arch/arm64/boot/dts/rockchip/rk3588s-orangepi-5.dtb] Error 2
make[2]: *** [scripts/Makefile.build:481: arch/arm64/boot/dts/rockchip] Error 2
make[1]: *** [/home/jc/pw/linux/Makefile:1389: rockchip/rk3588s-orangepi-5.dtb] Error 2
make: *** [Makefile:240: __sub-make] Error 2
Damn it! Why did it fail? You only have to read the output to realize that I used the same reference to the vcc_3v3 regulator without checking if it exists in the DT. You can solve this by adding a reference to an existing regulator like the vcc_3v3_s0 included in the same DT (an obvious hack for learning purposes).
make CHECK_DTBS=y DT_SCHEMA_FILES=ti,hdc3020.yaml rockchip/rk3588s-orangepi-5.dtb
  DTC_CHK arch/arm64/boot/dts/rockchip/rk3588s-orangepi-5.dtb
Another example: I will forget the required reg property…
arch/arm64/boot/dts/rockchip/rk3588s-orangepi-5.dts:154.30-160.4: Warning (i2c_bus_reg): /i2c@fd880000/hdc3020@47: missing or empty reg property
/home/jc/pw/linux/arch/arm64/boot/dts/rockchip/rk3588s-orangepi-5.dtb: hdc3020@47: 'reg' is a required property
	from schema $id: http://devicetree.org/schemas/iio/humidity/ti,hdc3020.yaml#
If you ever find yourself writing device trees, you will be glad you know this tool ![]()

