
I have been writing articles about Linux for over a year, and I just realized that I did not cover the first and foremost point for many beginners: how to install a Linux-based operating system! This time I am going to show you how to smoothly switch from Windows to Linux, step by step. It’s really easy, so let’s get started!
If you would like to watch it instead of reading, check out my video tutorial on YouTube:
Content:
- 0. Linux is NOT an OS
- 1. Get the latest version of Ubuntu
- 2. (Optional) Give it a try on a Virtual Machine (VM)
- 3. Burn the image onto a flash drive
- 4. Boot from the flash drive, install, enjoy!
0. Linux is NOT an OS
This confuses beginners a little bit, but it’s not that difficult: Linux is only the kernel (oversimplified: the software between the hardware and the rest of the programs) that many distributions or distros use as a key element of the complete operating system. Therefore, you will not install just Linux, but Linux with a lot of other software packages. Other operating systems like Windows or macOS work similarly, but with much more opacity and way fewer options for the user to configure what to install and especially, what not.
Therefore, we are actually going to install a distro, even though I will continue using the term Linux for it for simplicity and to highlight that you could follow a very similar approach to install any other distribution of your choice. Here I am going to walk through the installation of Ubuntu because it is the one I have been using for many years, it is beginner-friendly, and there is a lot of documentation and online support for it. By the way, I am not sponsored by Ubuntu, and many other distros will work out of the box as well. But as I can’t show you an example of every of them (there are dozens of them), I picked the one I wanted to install on my laptop for the upcoming bikepacking adventure.
1. Get the latest version of Ubuntu
A very easy step: just open your browser, look for “Ubuntu download”, and the first link you will find will probably be from Ubuntu to its Download section (or get direct access here). I chose the current LTS (Long Term Support), which is Ubuntu 24.04.
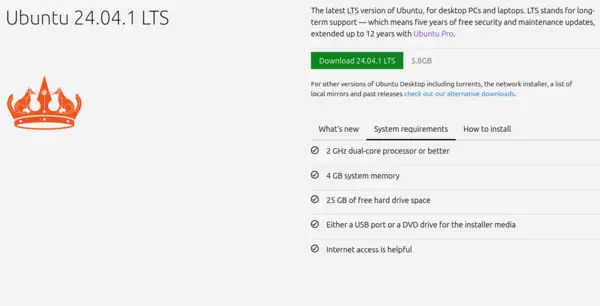
The download will take a while (~5.8 GB), and you will get a single file (a .iso image) that we will now use to try Ubuntu on a virtual machine and burn it onto a flash drive for the real installation.
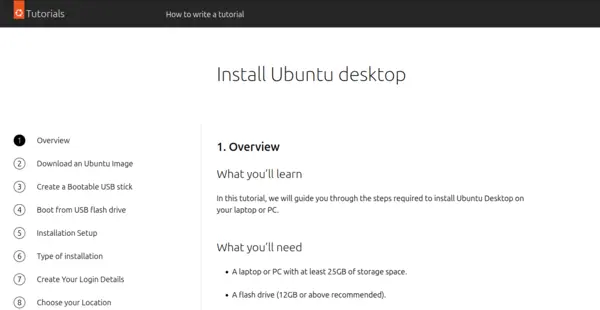
By the way, right under the Download button you will find some interesting information like the Requirements and a How to install guide with a comprehensive Step-by-step tutorial. Check it out here if you face any problem that I didn’t cover in this article. .
2. (Optional) Give it a try on a Virtual Machine (VM)
If you are not sure if you really want to switch, and you would like to give Linux a try in a controlled environment, a VM is an easy solution. It will run on Windows more or less like a regular program, and you will be able to remove it later without any complications. This approach is simpler than dual booting (keeping Windows and installing Linux alongside), and therefore a bit beginner-friendlier.
If you want to go for this option, a well-known program to create VMs is Oracle VirtualBox, which you can download for free from the official website:
Choose the Windows version of the program, download the .exe file, and then install it like any other Windows program. Once you are done, you can start it and create a new VM by clicking on New:
Then select the Ubuntu .iso image we downloaded in the previous section, and configure it as you like (number of processors, RAM, disk size, etc.). If you don’t select Skip unattended installation, VirtualBox will install everything with default configurations and your intervention will not be required (if you don’t change it now, a default user will be created with the changeme password). You can of course change the defaults later. It will take a while until the installation is finished, but as it is like any other application running on Windows, you will be able to so some other stuff in the meantime.
Once it’s done, you can simply start the VM and work with it as if it was a full installation until you get convinced and get rid of Windows for good ![]()
3. Burn the image onto a flash drive
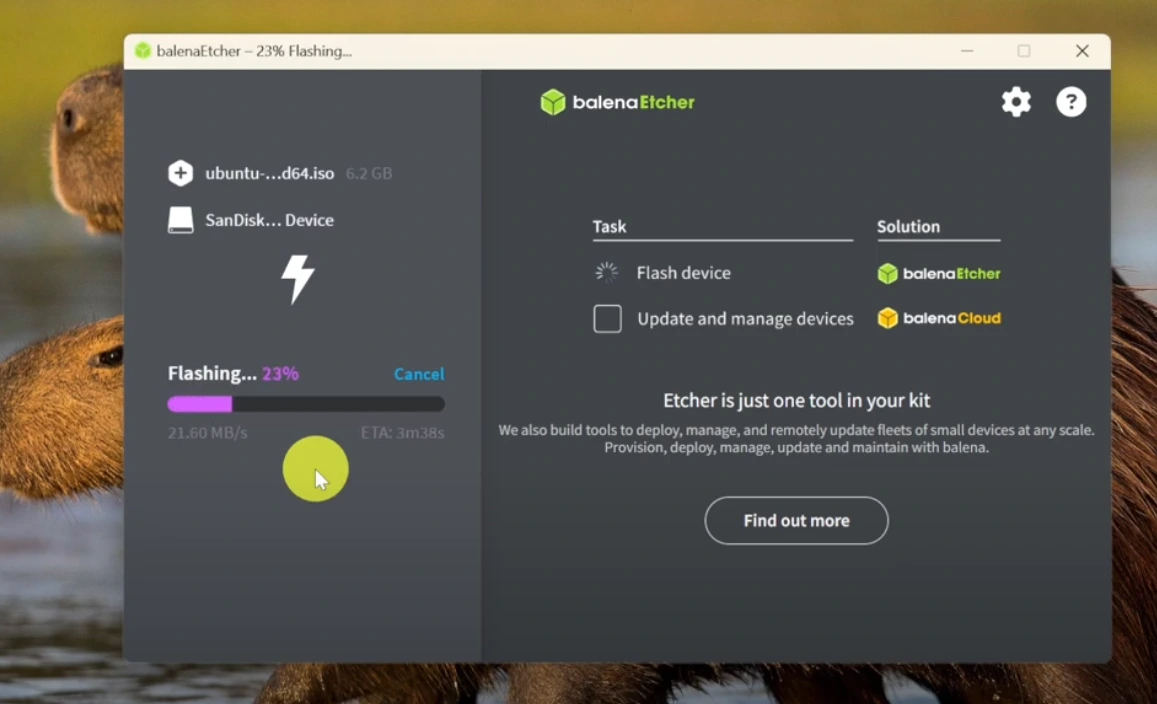
We are going to use balenaEtcher for this. The goal is to get a USB flash drive ready for the computer to boot from. Think of it as an Installation Disk that you can format when you are done to reuse it. balenaEtcher is the recommended program from Ubuntu itself, as stated in the download section. You can get it here.
Again, select the Windows version, download, and install.
The basic usage of this program is straightforward: select the Ubuntu .iso image, the USB drive (watch out, it will delete its content first!), and flash. It will take a few minutes and if everything goes well (there is an optional validation step, enabled by default, that will check that), you are ready to install Linux on your computer ![]()
4. Boot from the flash drive, install, enjoy!
After turning off the computer and connecting the flashed USB drive, we will have to tell the BIOS (oversimplified: a program that runs before the OS starts) that we want to boot from that USB drive instead of starting Windows. That’s usually done shortly after powering on, when a message about entering the BIOS or interrupt the booting process (the BIOS and this messages vary among manufacturers, but they are always similar) by pressing some key. The most common keys for that are F10, F12 and Enter, but just read the message or look for the right key for your computer online.
To enter the BIOS of my Lenovo laptop, I have to press Enter and then ESC. Once you enter the BIOS, look for a menu called Boot, Startup, or something similar, and select the USB drive to be the first choice for the next boot (there is usually a list where you will also see Windows, probably at the top). Save, Exit, and after rebooting, you should see a new menu to install Ubuntu.

By the way, some manufacturers offer direct access to the boot menu for a single boot, so you don’t have to access the BIOS, go through the menus, and restore the boot priorities after you are done. For Lenovo, press F12 instead of Enter to save some time. Either way, you will end up seeing the same installation menu:
At this point you can configure the installation as you wish (language, keyboard, accessibility, etc.), create a user with a password, and select the installation type (e.g. dual boot, erase disk and install Ubuntu). Then the installation will begin, and you will only have to be patient until it is finished to enjoy your Linux-based distro!
4.1. Recommendation: encrypt your disk
This step is optional, but I strongly recommend it if there is the minimal chance that your computer might be stolen. For me as a bikepacker, that’s a no-brainer: the chance exists indeed. I hope it will not happen, but… you never know. Encrypting your disk will add an extra layer of protection to your stored data by keeping the bad guys from reading the content of your disk unless they have access to the encryption password, which should not be anything as trivial as 1234 or changeme ![]()
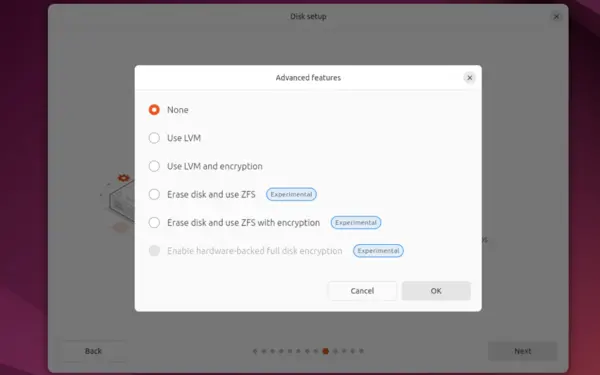
There is only one drawback: you will have to introduce an additional password after booting. If you can live with that (there are no speed or performance penalties), then you will have to go through an additional, yet trivial step during the installation, which is setting the encryption password. Don’t forget it, or you will have no way to access your data ever again!
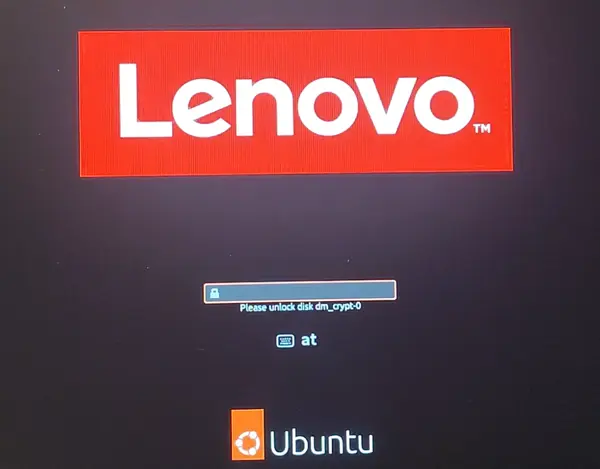
4.2. Troubleshoot: can’t install, encrypted disk
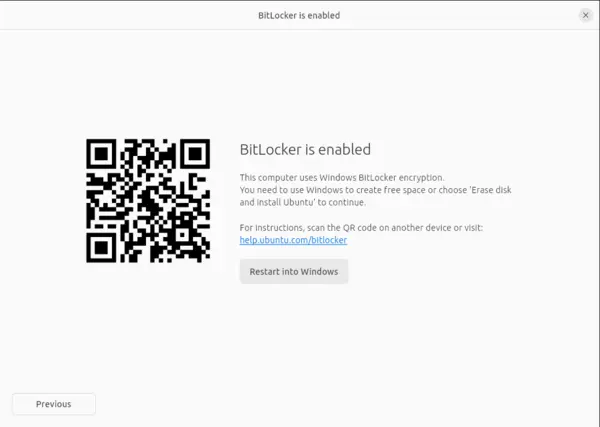
If you see that screen during the installation process (you might find something similar when installing other distros), don’t panic: you don’t need to be a hacker to solve it.
Abort the installation process and run Windows again. By the way, nothing has been erased yet, you can simply change the boot order again if you had to modify it. Now look for disk encryption and disable it. Once the disk is decrypted (it will take a while, be patient), you can exit Windows again and start the installation process over again. This time, Ubuntu will be installed without any problems!